App Settings
Comprehensive guide to AutoCropper's settings, including file naming structures, feather crops, and visual customizations for enhanced photo cropping.
AutoCropper offers a range of user-configurable settings to customize your photo scanning and cropping workflow. Adjust file naming structures, apply feathering to crops, and personalize visual elements to suit your needs.
Accessing the Settings Menu
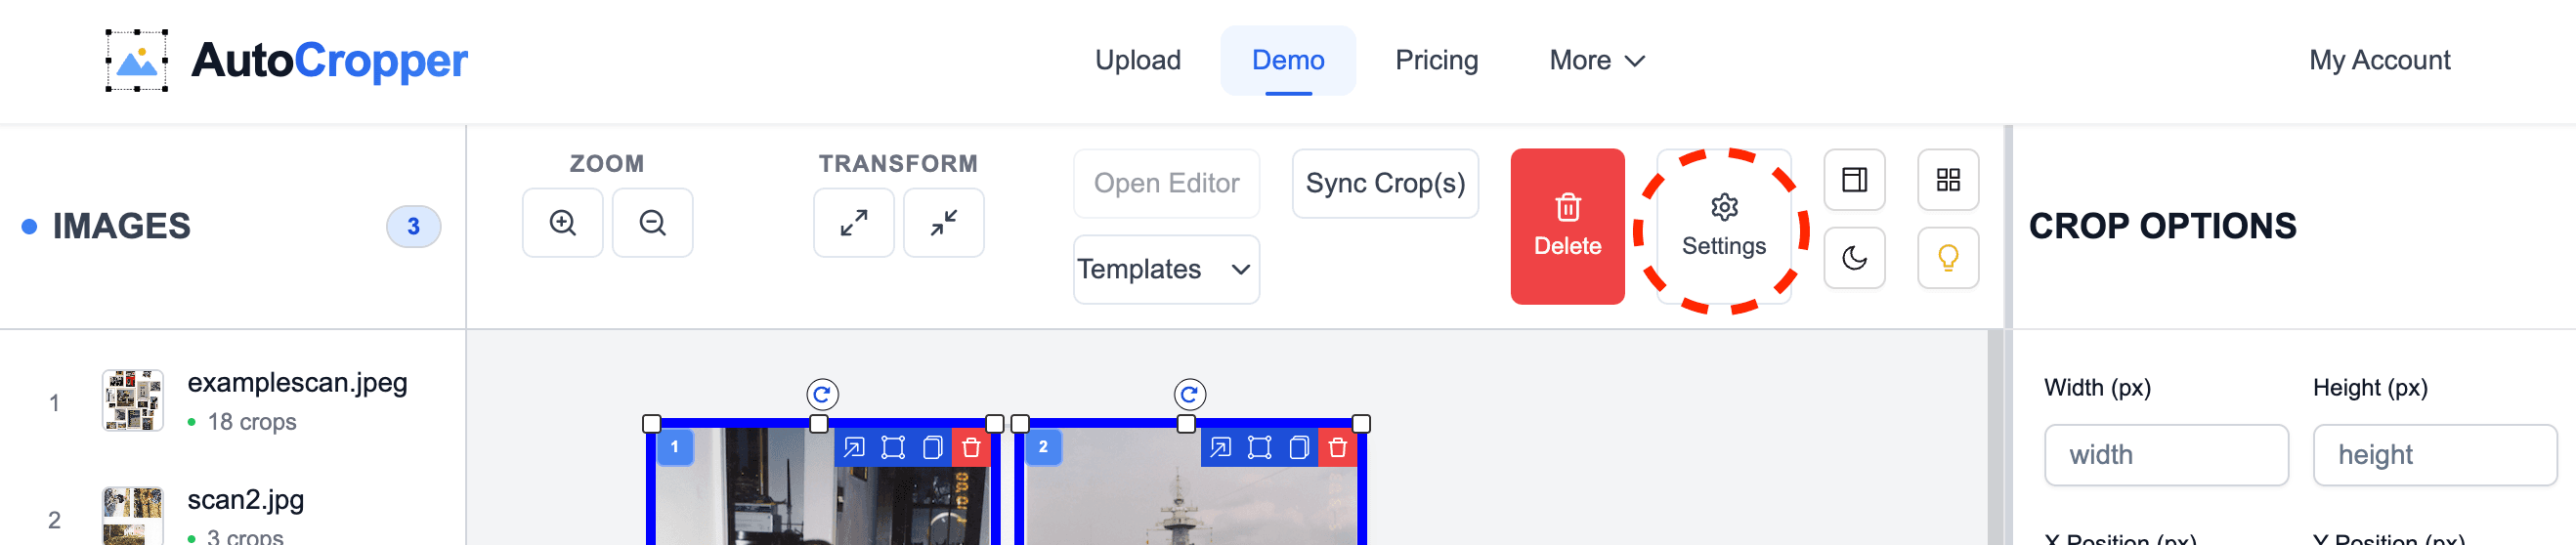
You can access AutoCropper settings by clicking the Settings button on the Top Toolbar.
Changing the File Naming Structure
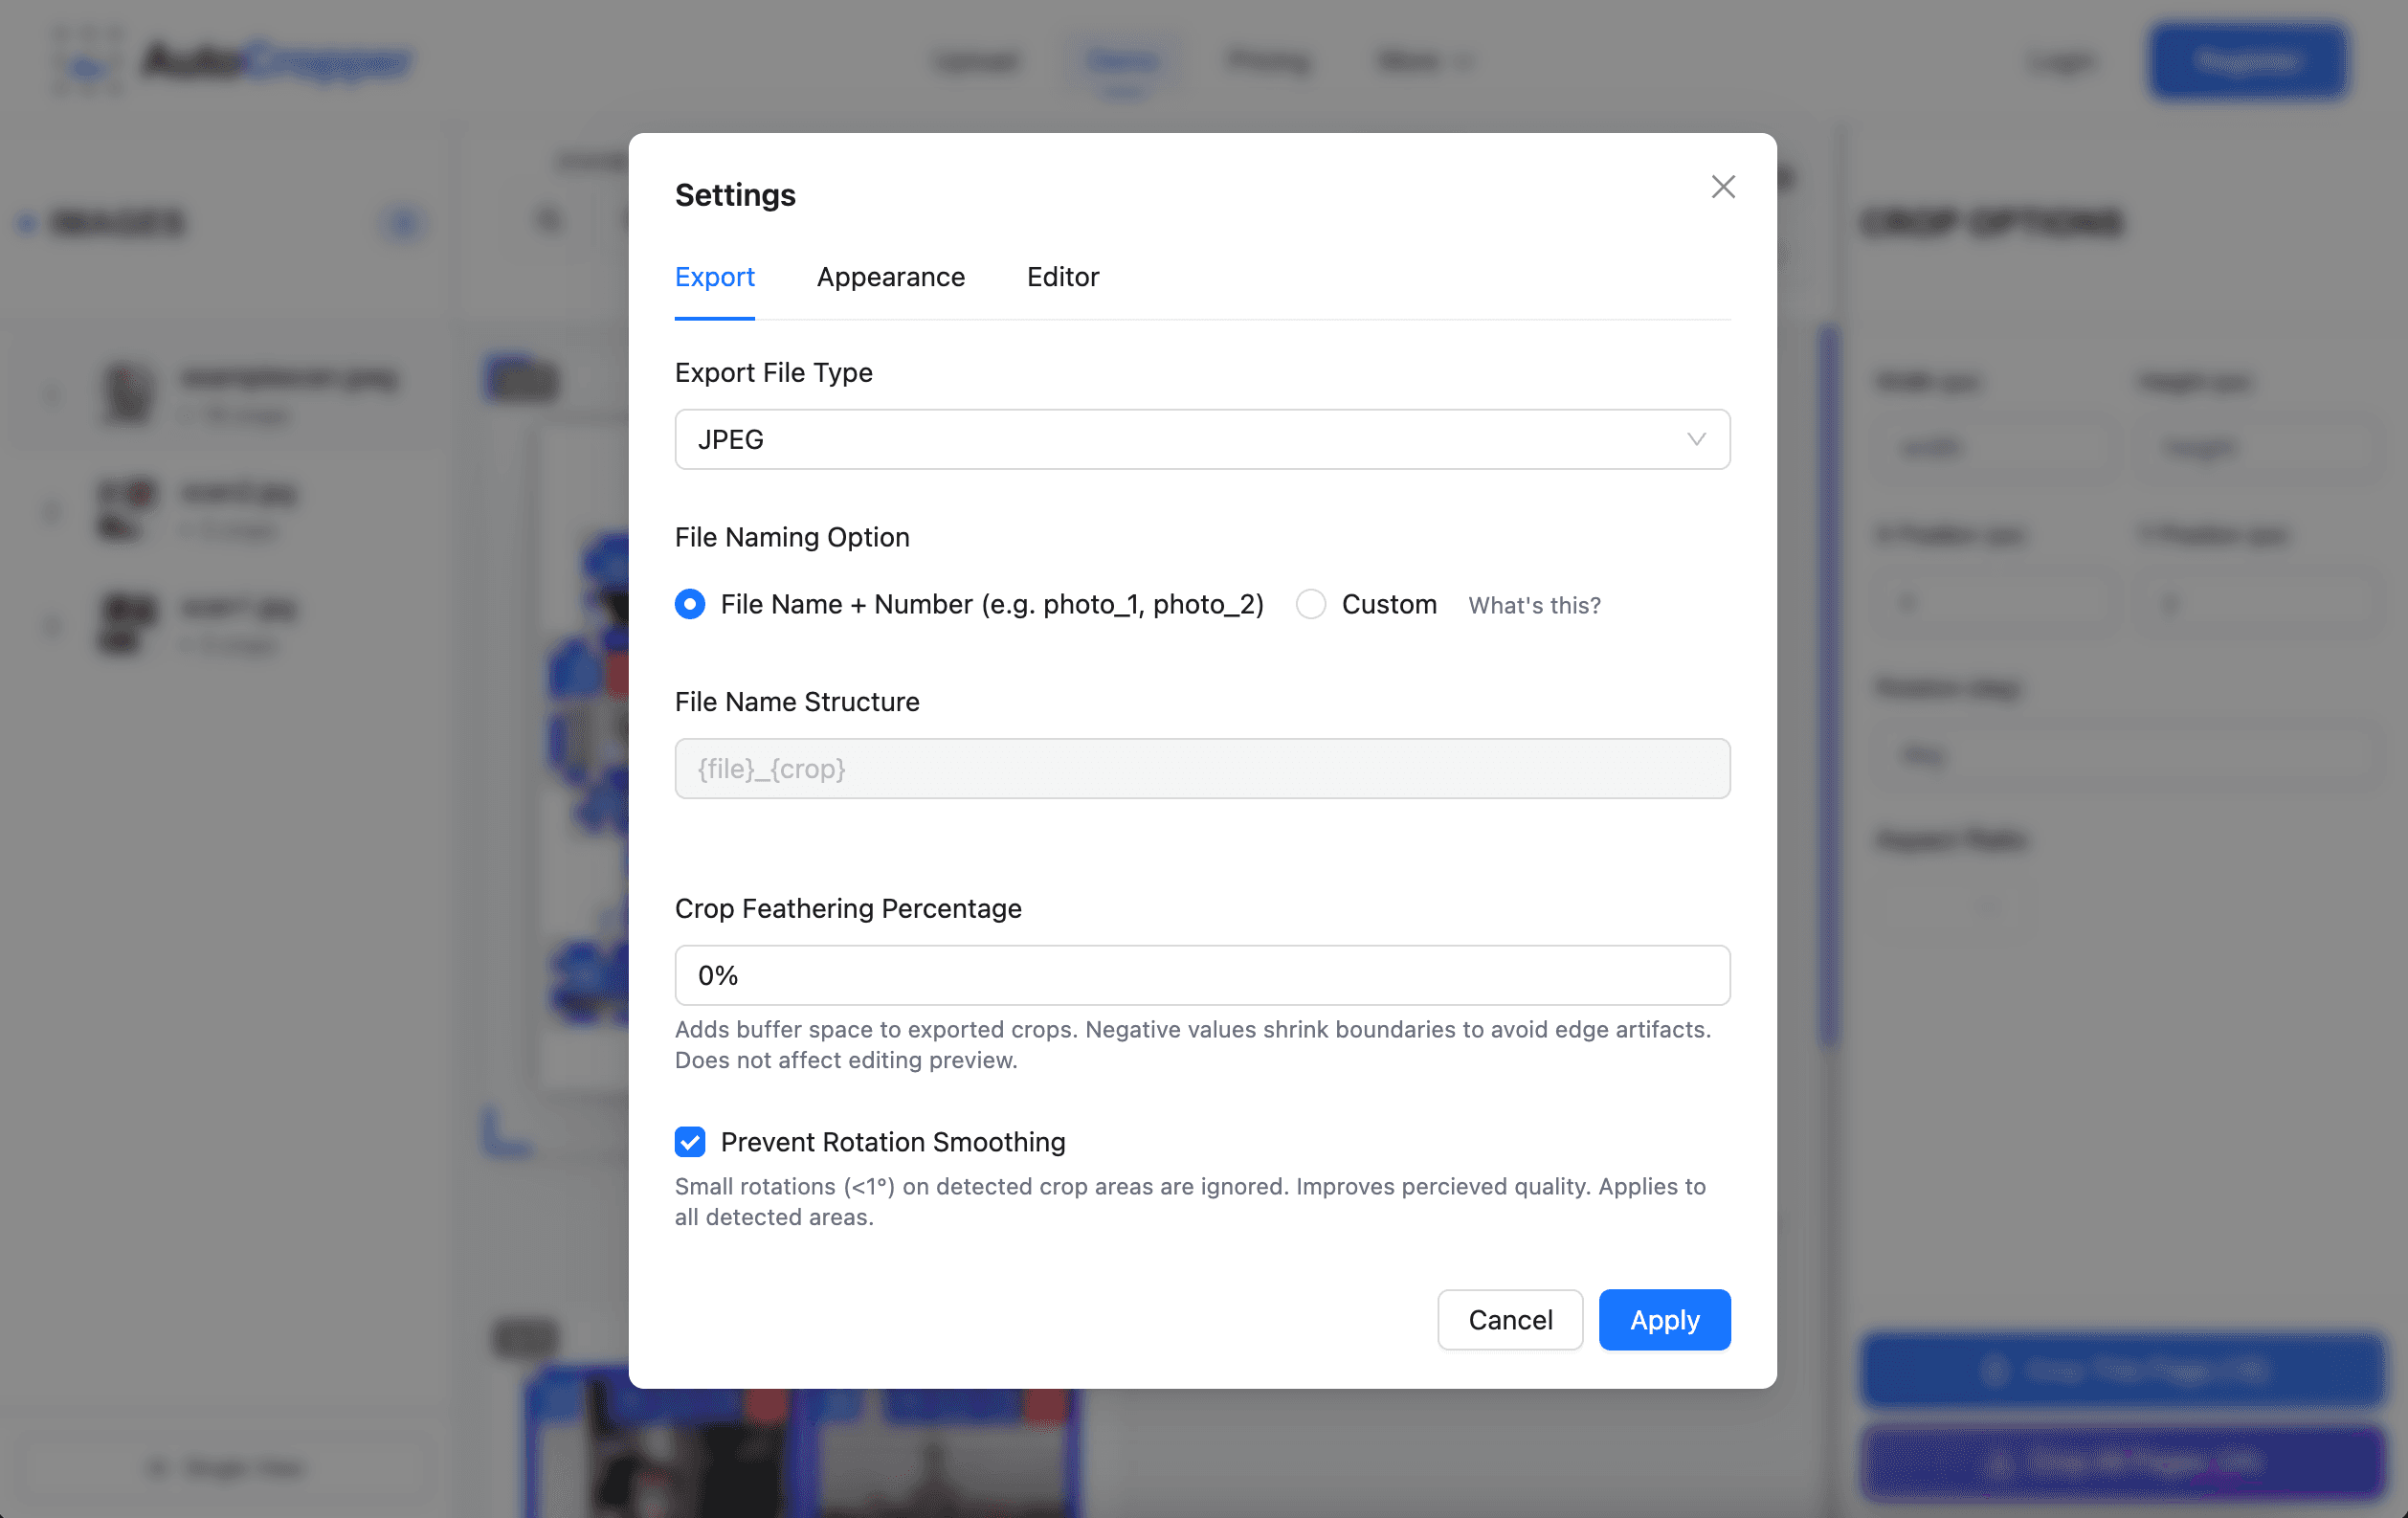
To change the file naming structure, click the Settings button.
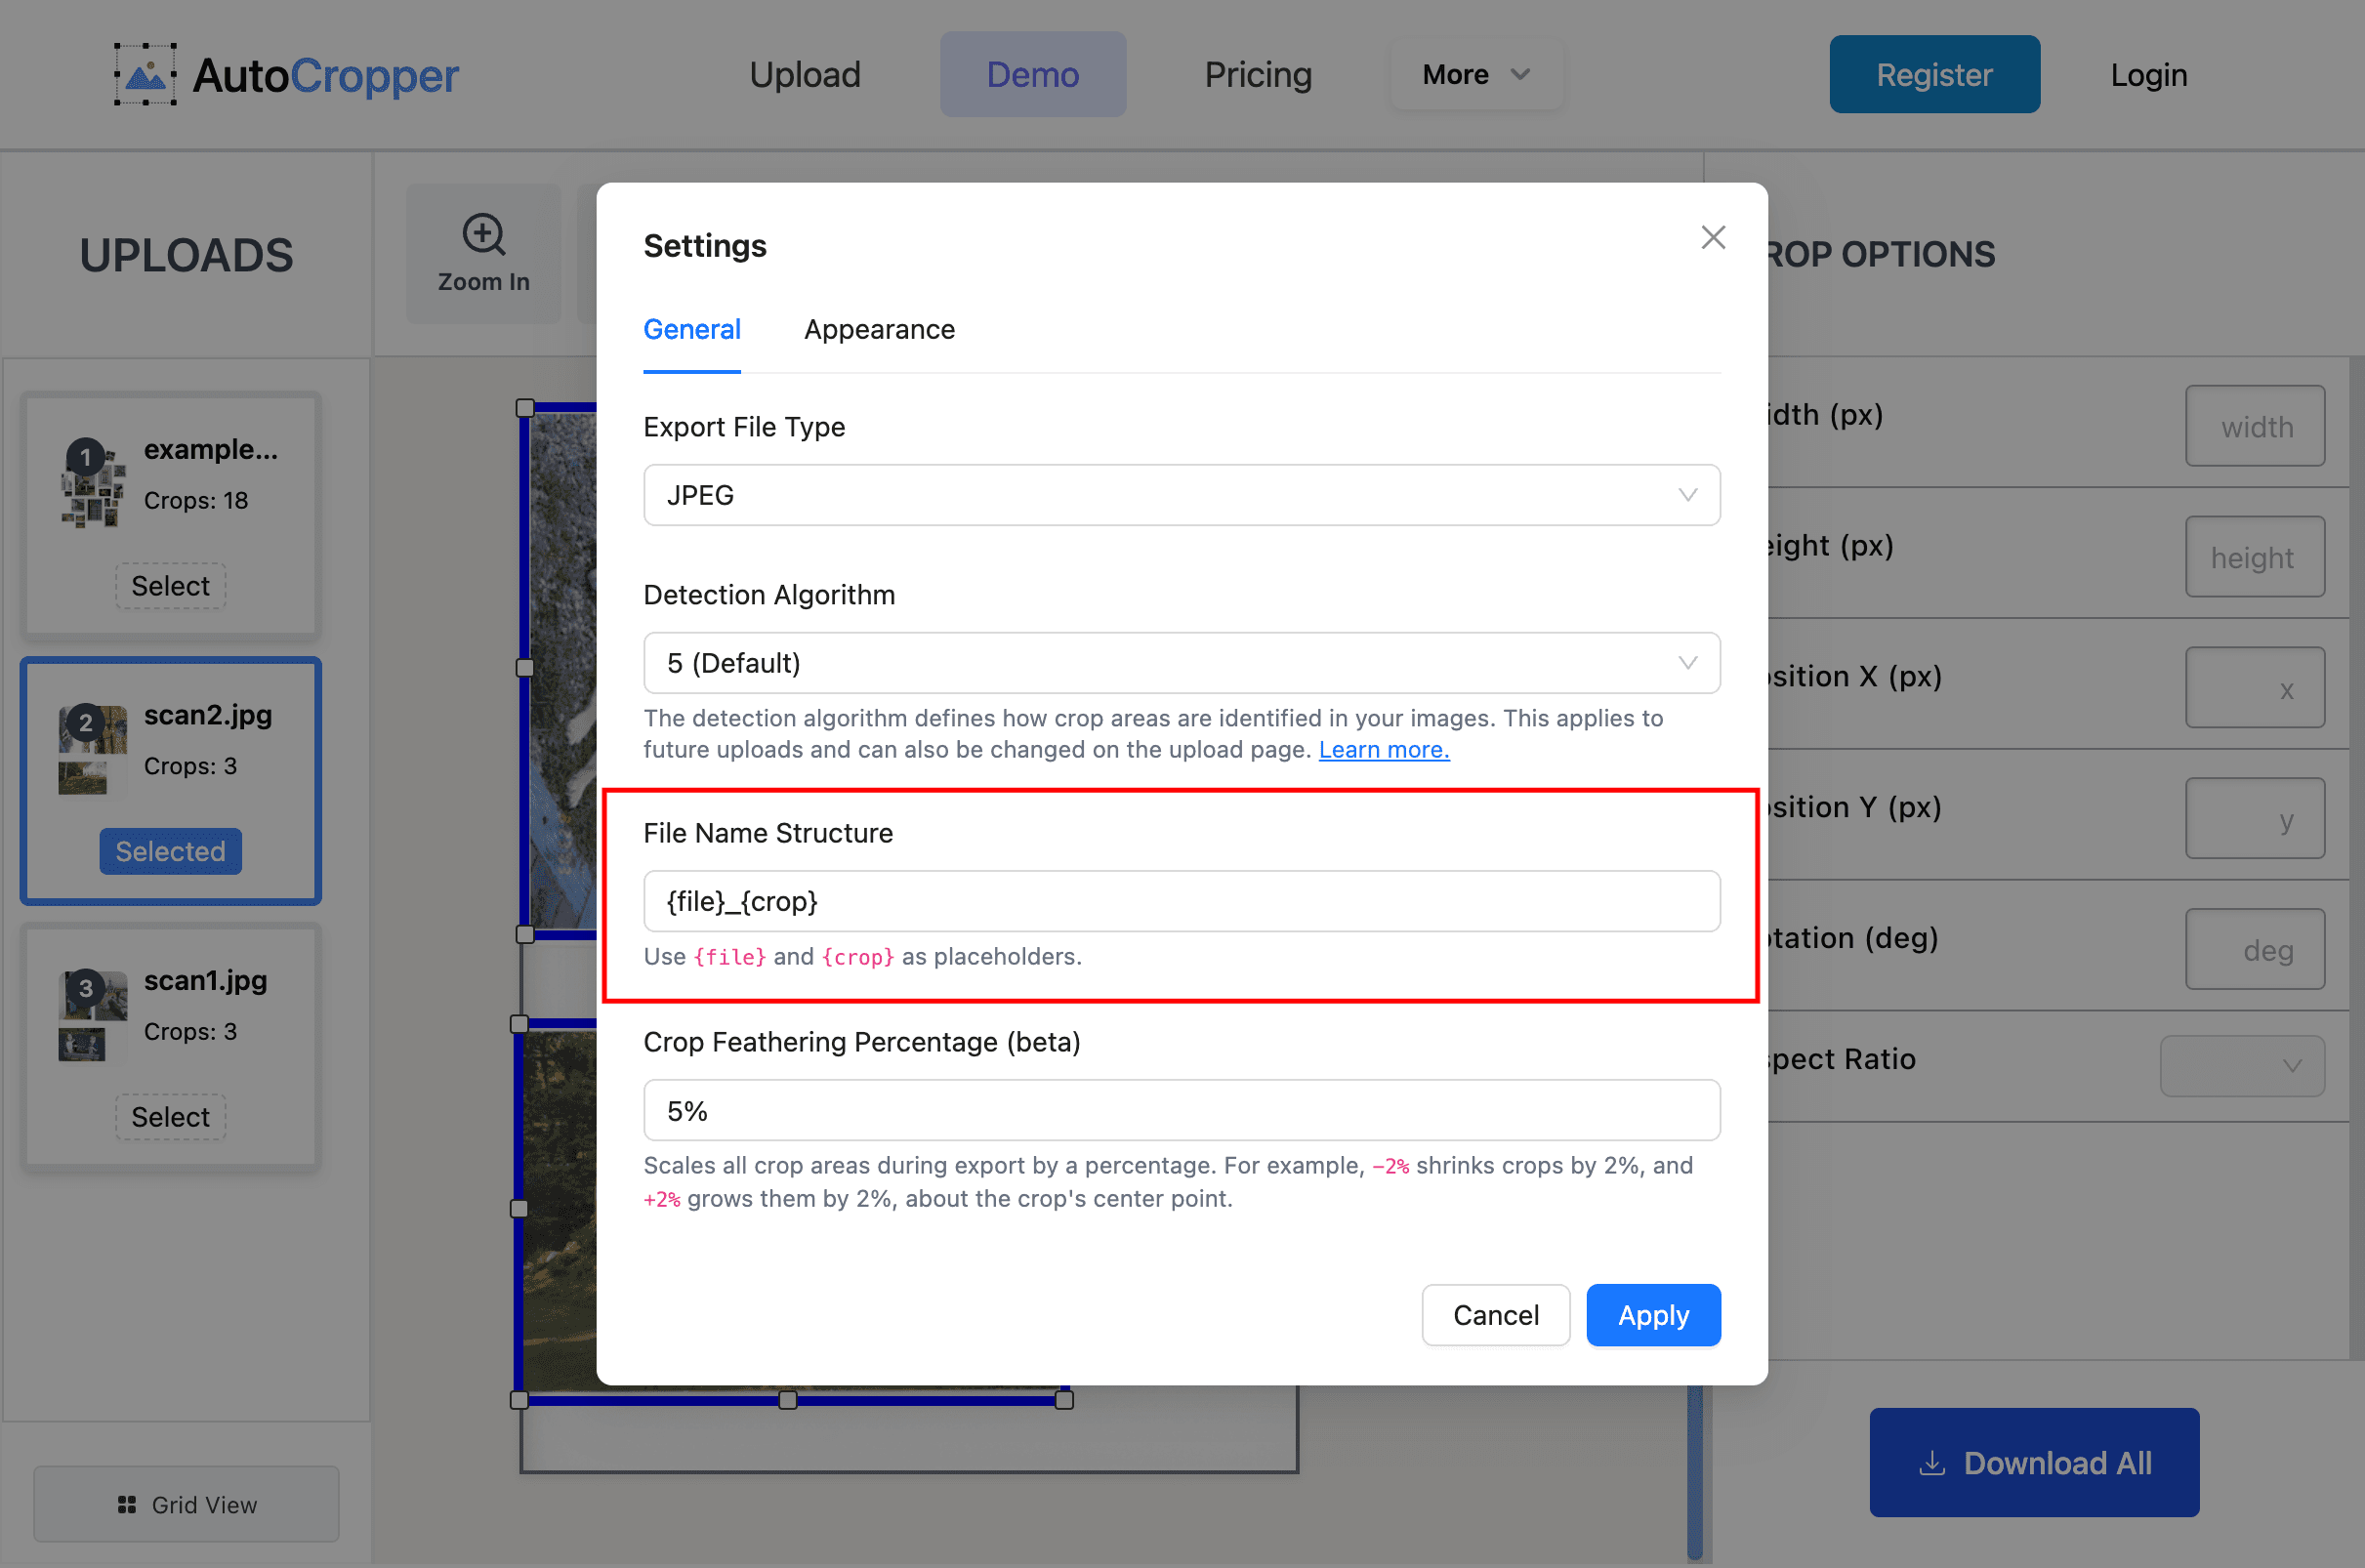
In the settings modal, you can see the File Name Structure text box. The default file naming structure is {file}_{crop}:
You can customize the file naming structure to your preference. You are required to include {file} and {cropId}.
Placeholders:
{file}Represents the parent image filename without its extension, e.g.,familyPhoto1989.{cropId}Represents the crop's internal ID string, generated randomly and automatically.
If your file naming structure is set to epsonScan_{file}_photo_{crop}, the exported photos would be:
epsonScan_familyPhoto1989_photo_tmb5.jpgepsonScan_familyPhoto1989_photo_af7x.jpgepsonScan_familyPhoto1989_photo_o0dn.jpg
Feather Crops %
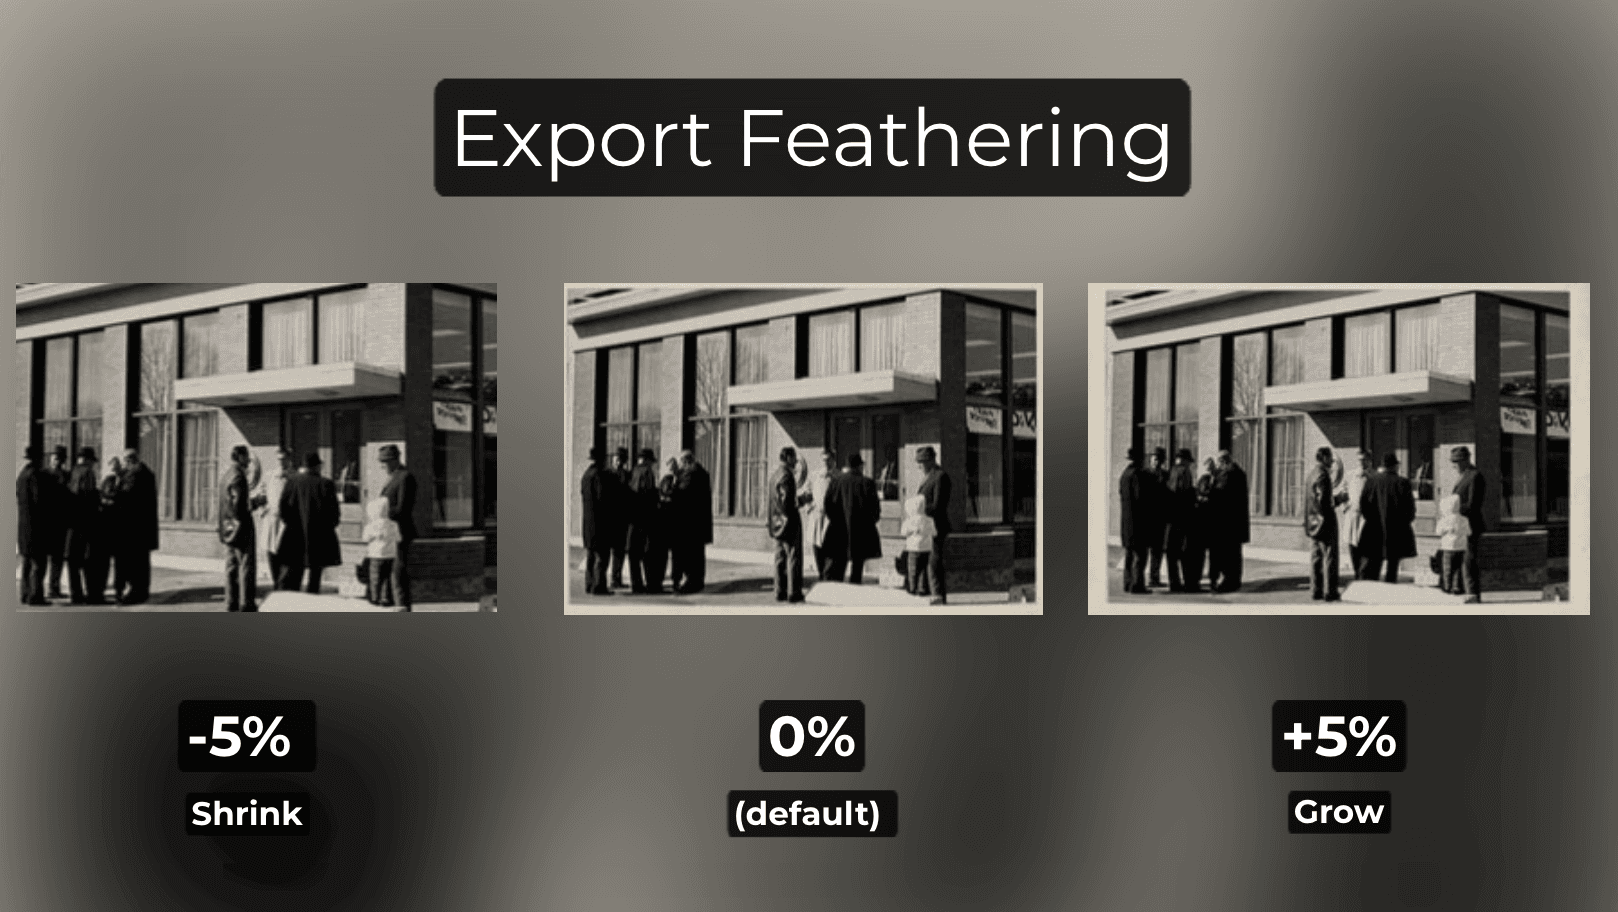
The Feather Crops % feature allows you to apply a scaler to grow or shrink all the crop areas when exporting. This is useful when your automatically detected images might have a slight residual border around their edges (like a white border if you are using a traditional flatbed scanner).
This percentage value is used internally when the Download All button is clicked and each individual crop area is used to create separate images.
Positive Percentage: Increases the size of the crop area by the specified percentage.
Negative Percentage: Decreases the size of the crop area by the specified percentage.
Notes:
Scaling About Center: The crop area scales uniformly around its center point.
Application: Useful for ensuring that cropped areas include a margin around the selected section for better visual quality, or to remove any borders.
Visual Customizations
Customize the appearance of crop borders to match your preferences.
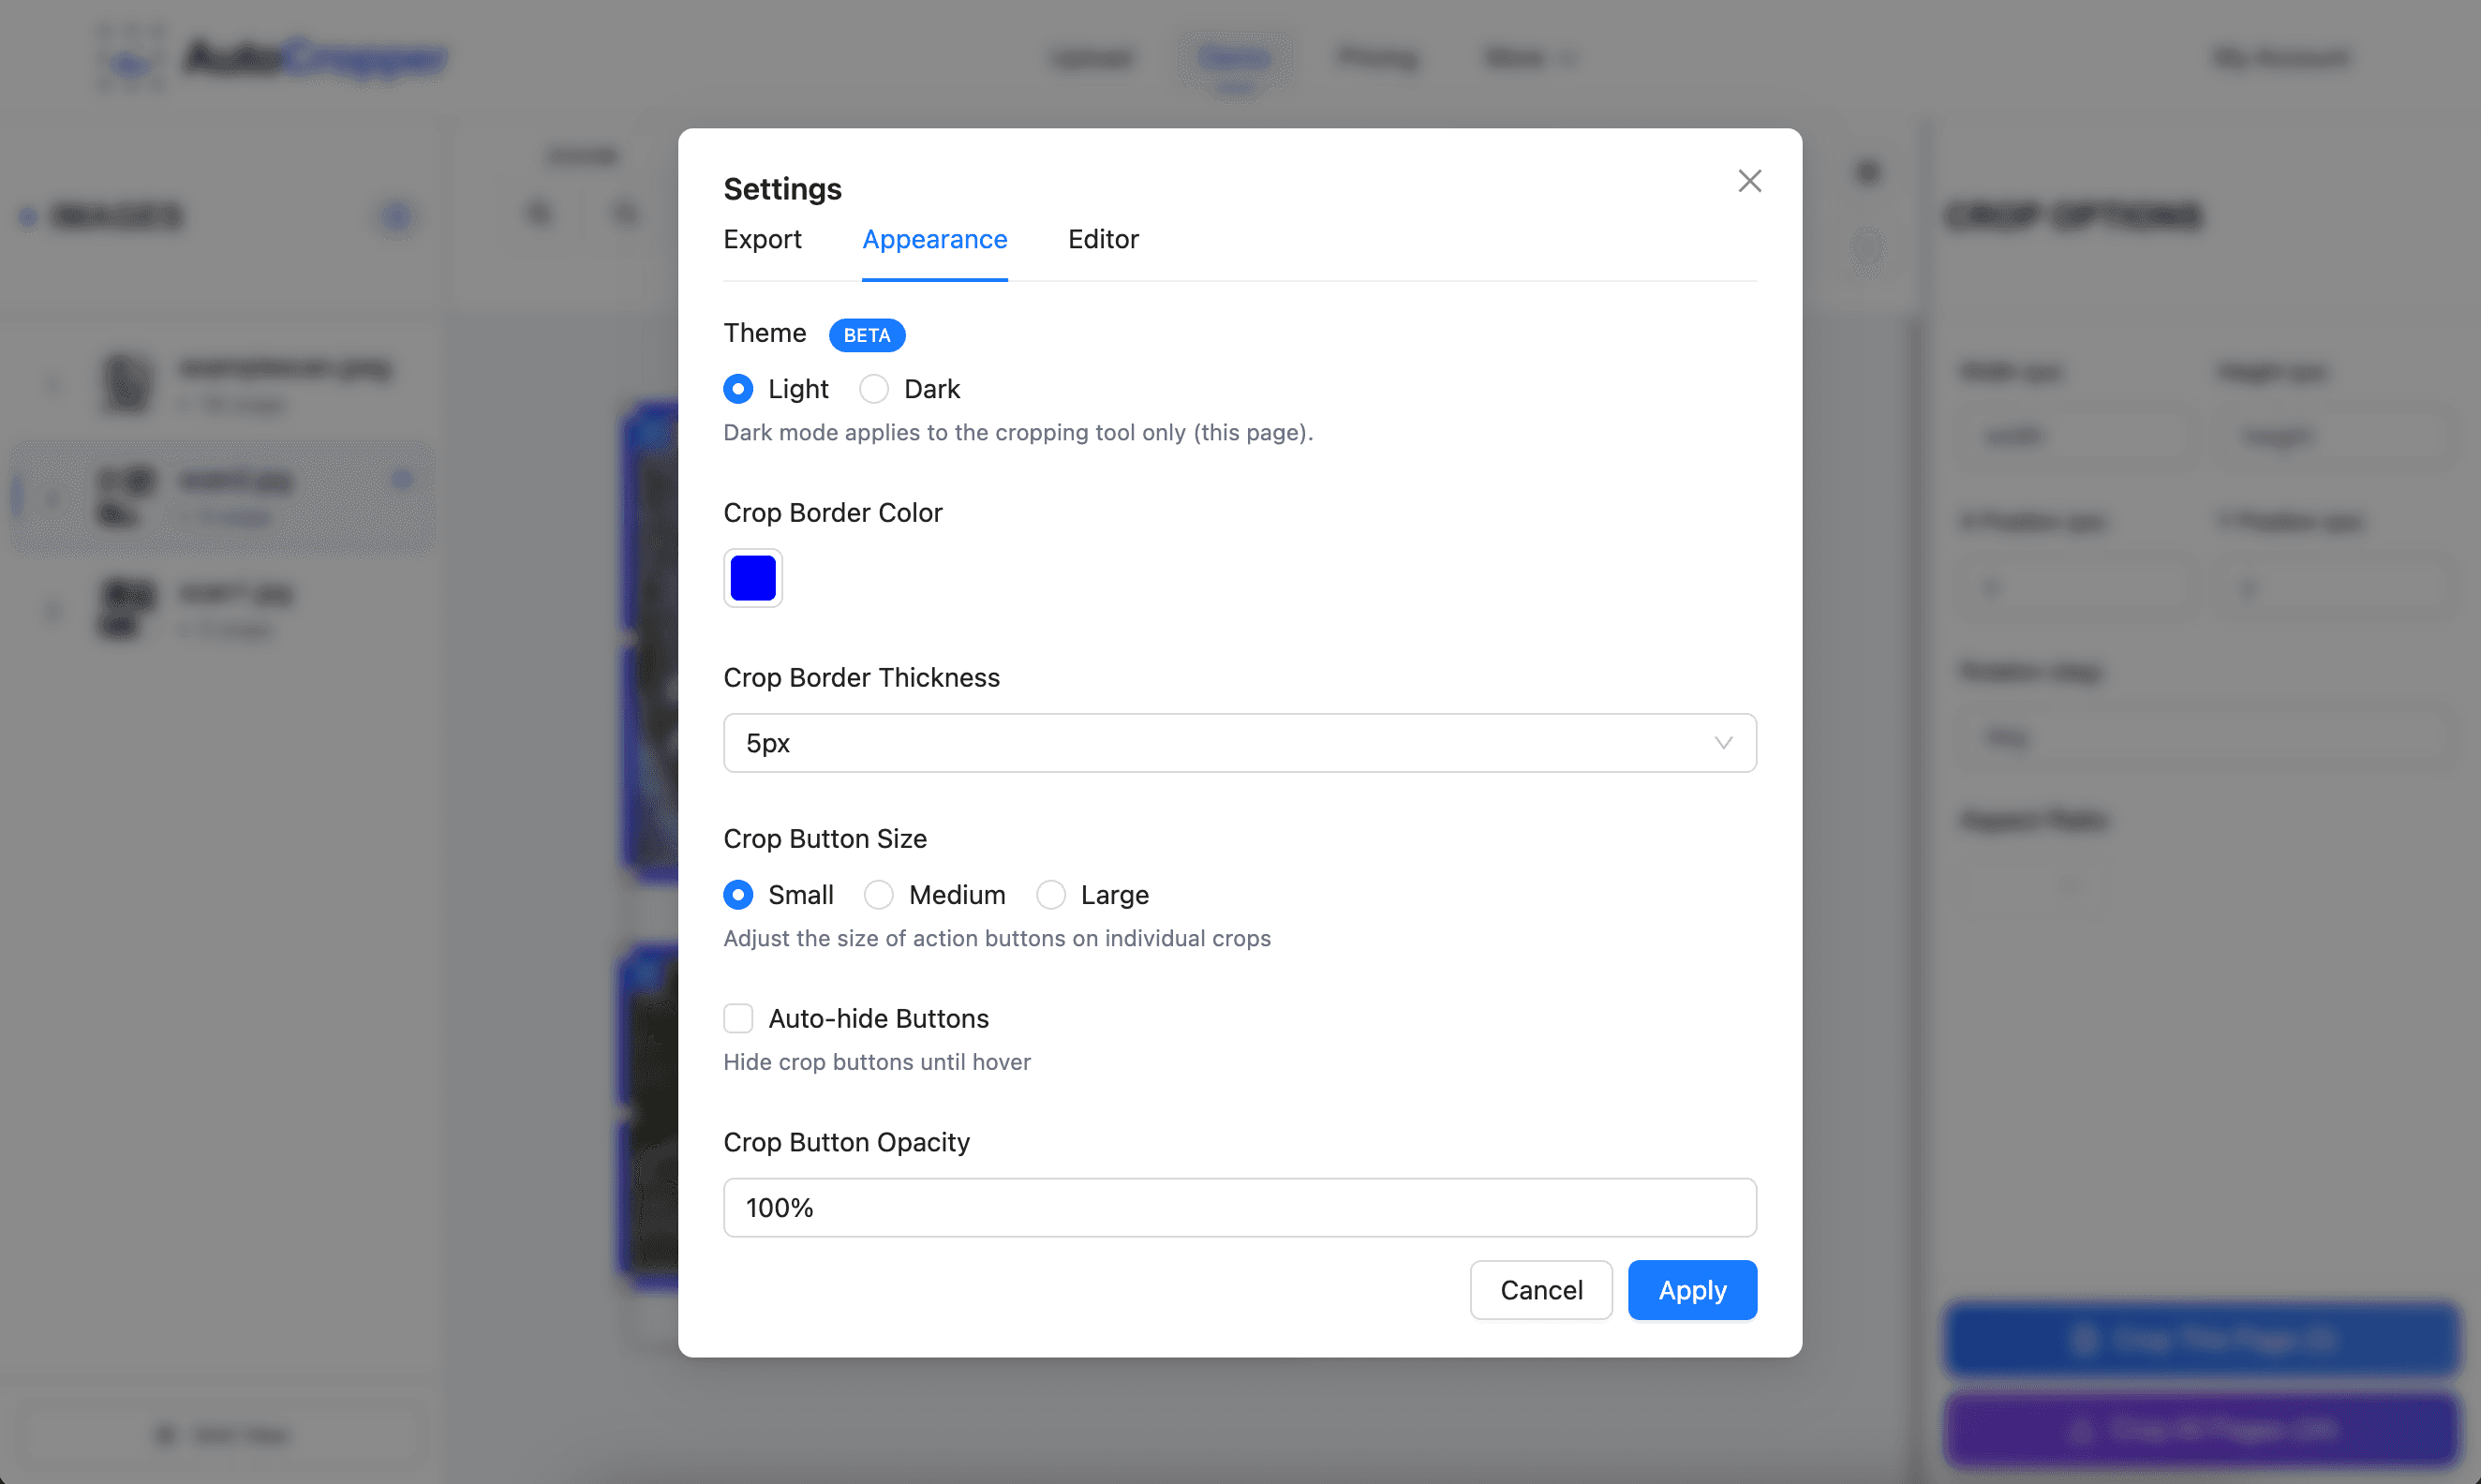
Crop Border Color
You can change the crop border color to any color of your choice. The default color is royal blue.
Crop Border Pixel Width
Adjust the pixel width of the crop borders. The default pixel width is 5px.